Keep Calm and Love Bee Bumblebee Origami Flower Easy Rose With Peancil
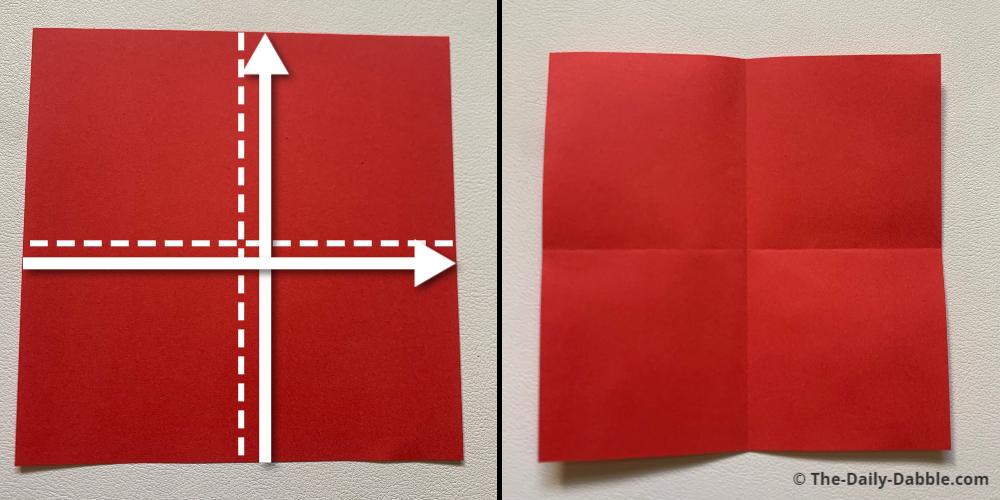
We may earn a small commission from affiliate links in this article.
Did you know roses are edible and some of the oldest flowers known to man? Though you won't want to eat this one, you can fold an easy origami rose with these step-by-step folding instructions. This paper rose is not too difficult for beginners and will take about 5 minutes to complete. You can also check out our origami flowers collection for more awesome flower designs when you are done. Let's get folding! I used a solid red sheet of square origami paper for this tutorial. If you don't have square paper, you can always make a regular paper square by cutting it. Fold the paper in half from edge to edge and then unfold it. From the opposite edges, fold the paper in half once again. Unfold it again to reveal the creases you made and move to the next step. It is best to complete this second set of folds on the opposite side of the first step folds. Fold the paper in half from point to point and then once more from the opposite ends. Fold the paper into a triangle by sandwiching the two middle triangles between the top and bottom. You have now folded the origami waterbomb base, one of the many common bases that can be used for many different desgins. Fold the lower points diagonally to the upper point. This fold will also match the bottom edges with the vertical center crease. Open one flap at a time and then squash fold them down from point to point. Grab the bottom middle corners and fold them in half diagonally. Take the very center flap and fold it in evenly in half upwards. Follow steps 4-7 again to fold this side the same way as the first. Flip the paper on its side and open it by pressing it down flat. Follow steps 4-7 again to fold this side the same way as the last two. If you flip the paper over, you should be on the final unfolded side of the four. Follow steps 4-7 again to fold this side the same way as the last three. Unfold the bottom completely, which is the side opposite of the point, to get it nice and flat. This flat side will be the base of this rose. After opening the pockets, hold the base with one hand and rotate the top of the rose in one direction to give it shape. The yellow dots show the best finger placement in the picture. Twist it until you can at least get the outer petals somewhat symmetrical. You can get a little better shape on the center of the rose by just twisting the very tip in the center. Keep twisting until you like the shape, and then even out the petals the best you can. You can also bend and close the outer petals if you want more of the condensed rose look. Now you know how to make a sweet little origami rose! Do you want some more awesome folding ideas? Pair your rose with a super easy origami butterfly, or make another flower like the origami lily! Happy Folding!1. Fold the paper in half twice from the edges
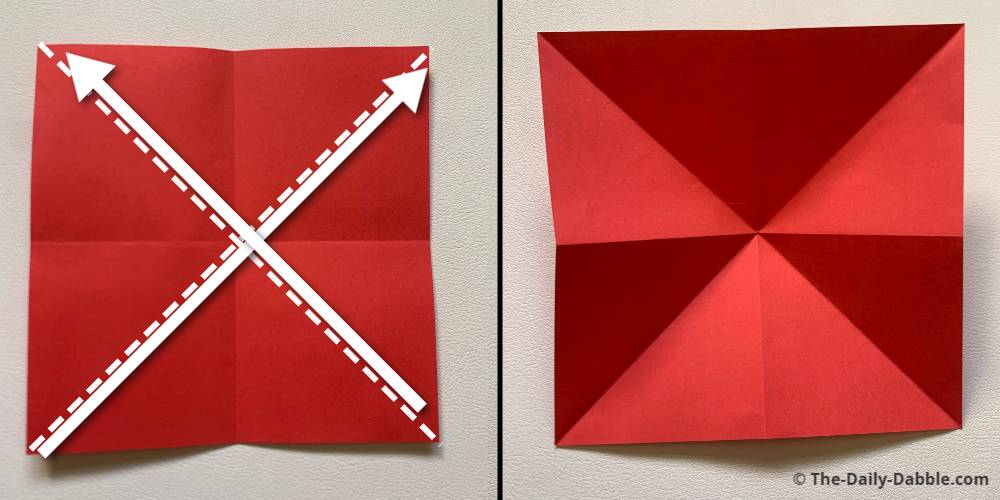
2. Fold the paper in half twice from the points
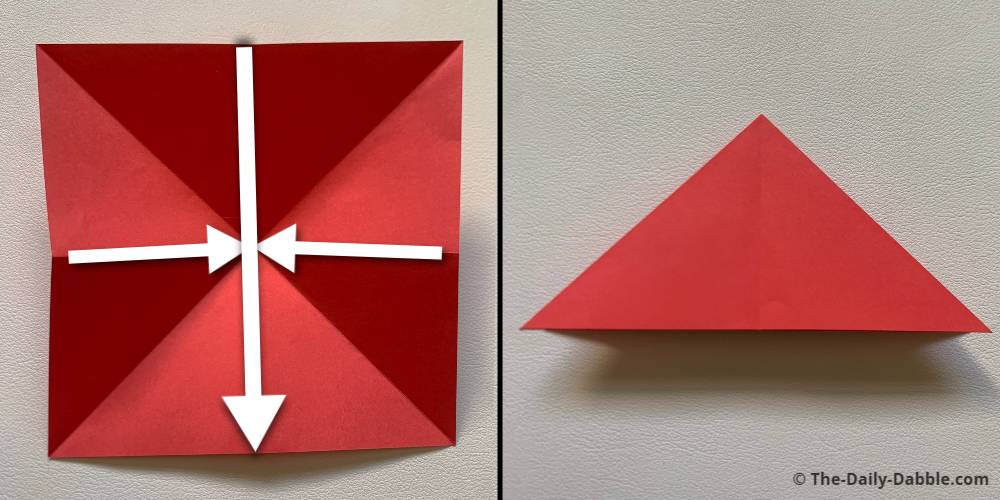
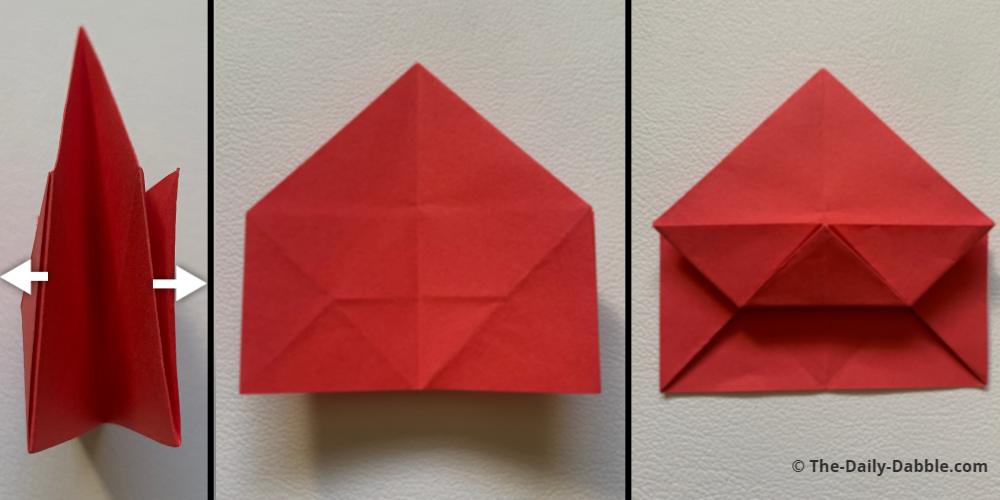
3. Bring the middle edges together and then top down over them
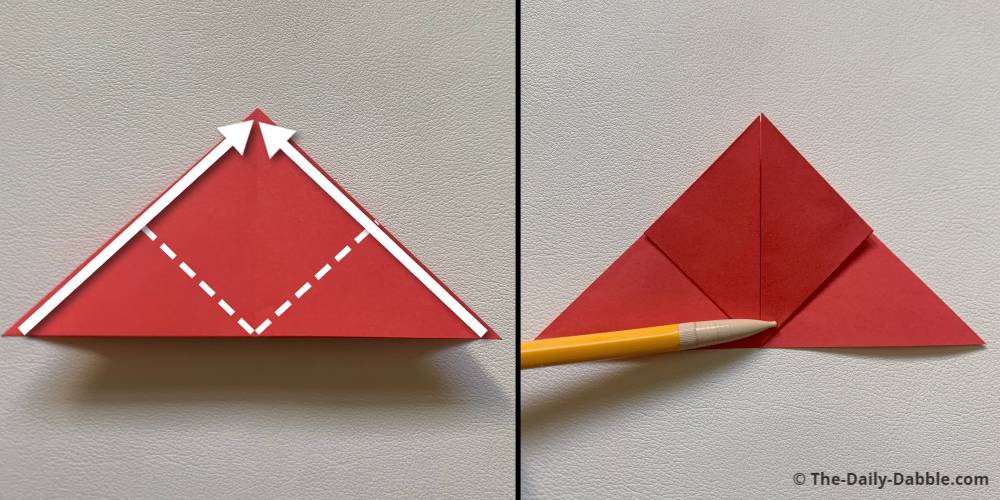
4. Fold the upper layer of the bottom points to the top
5. Open the flaps and squash fold them down evenly
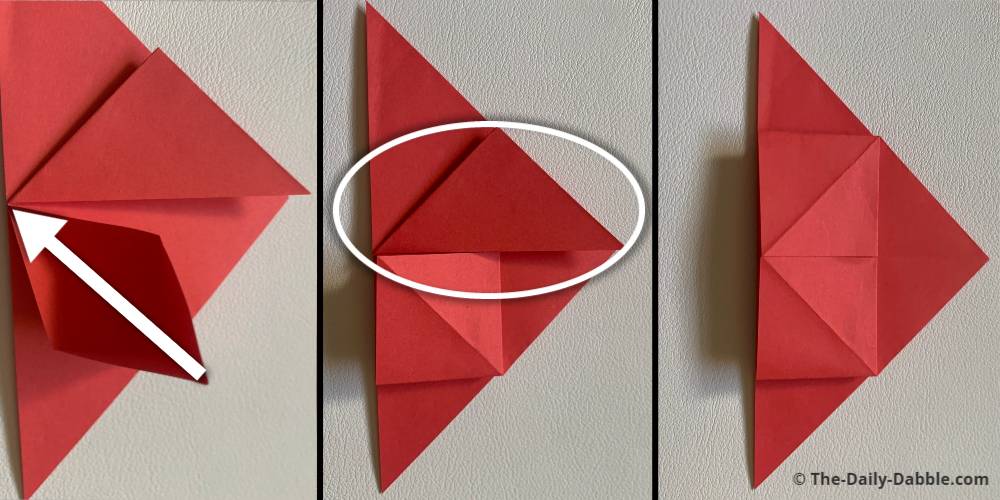
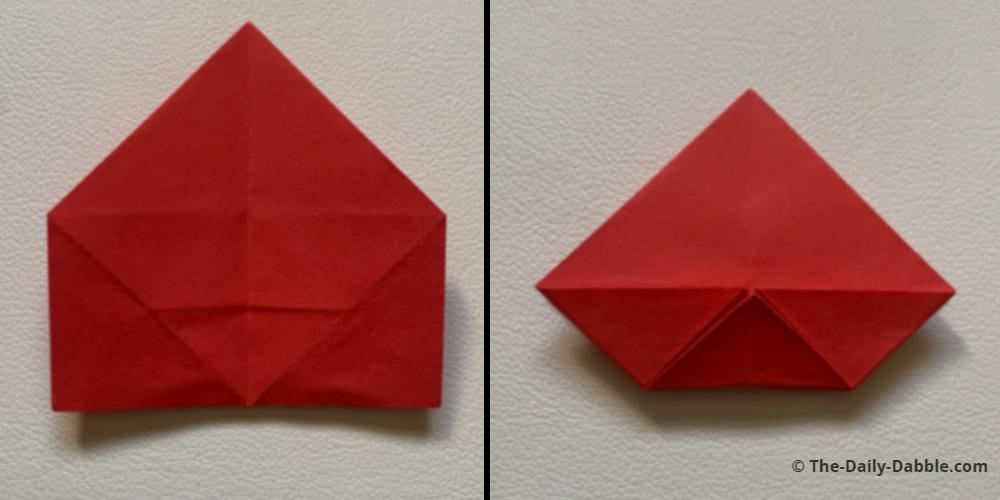
6. Fold the bottom middle points diagonally in half
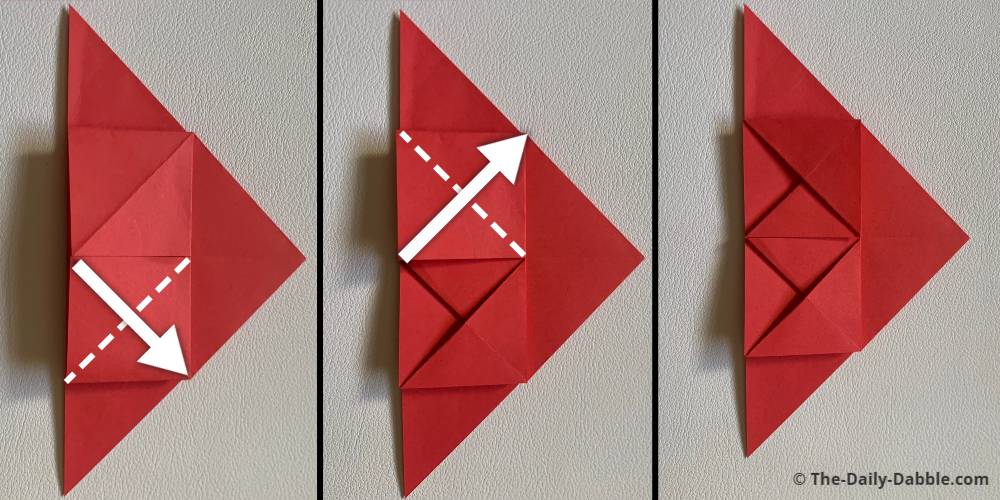
7. Fold the center flap up, directly in half
8. Flip over and repeat steps 4-7 on the back
9. Fold the paper in half twice from the points
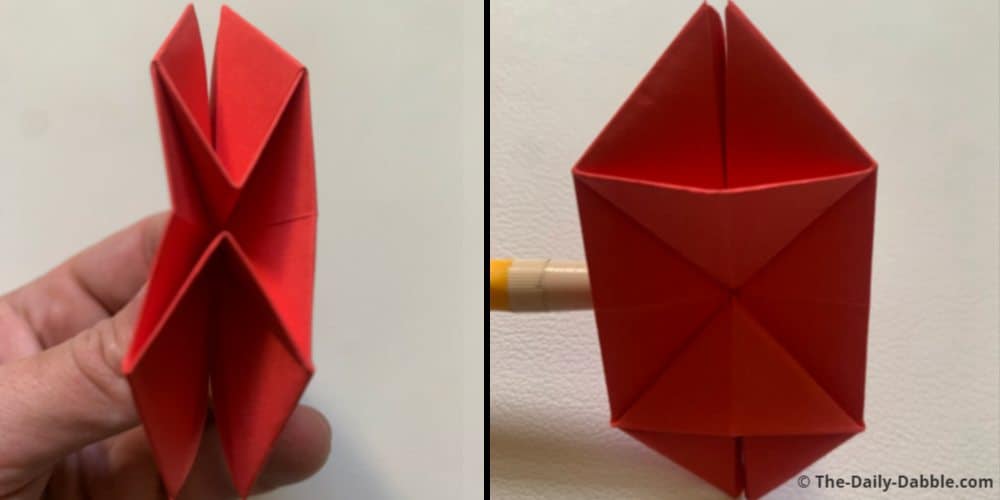
10. Repeat these same folds on the last unfolded side
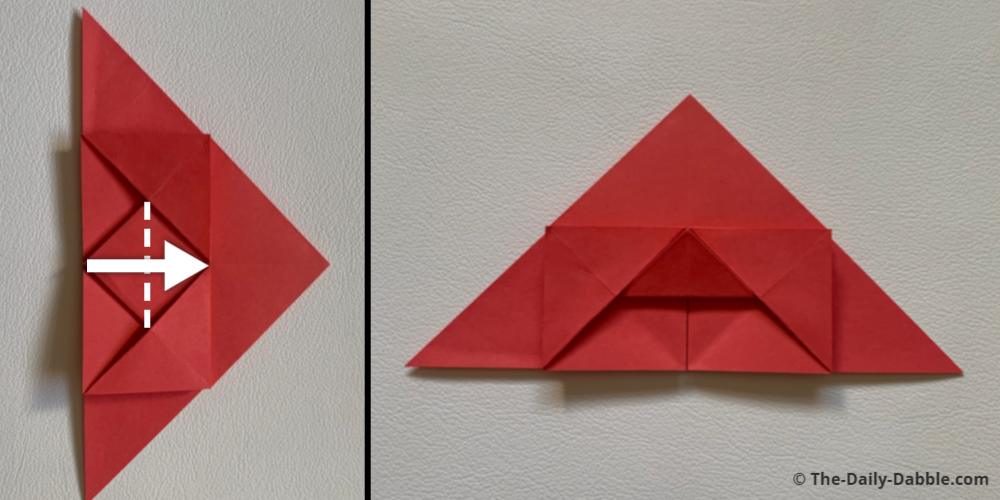
11. Open the bottom and fold it flat
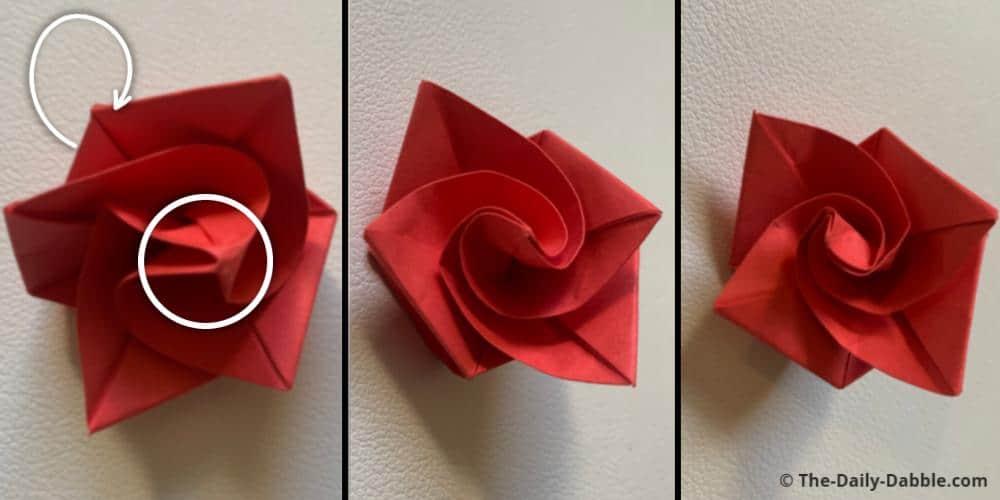
12. Open up the two pockets on the top and twist to shape it
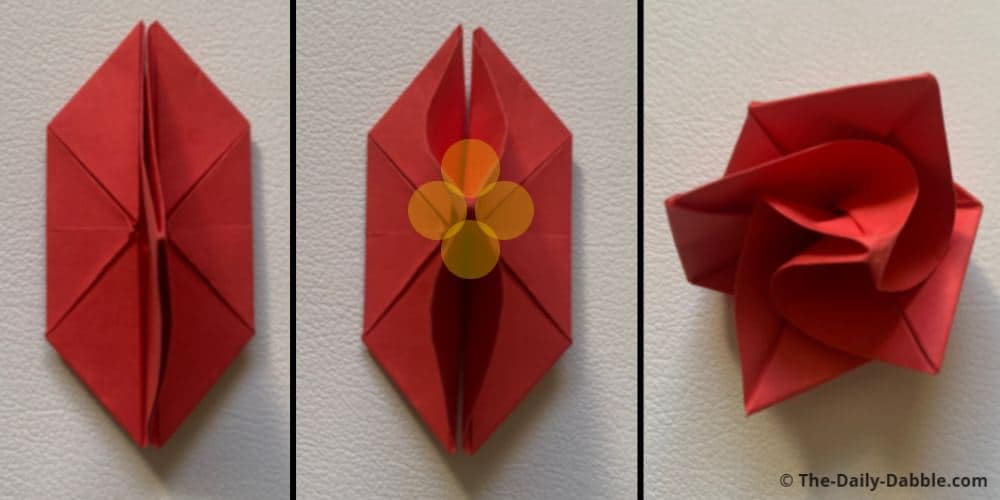
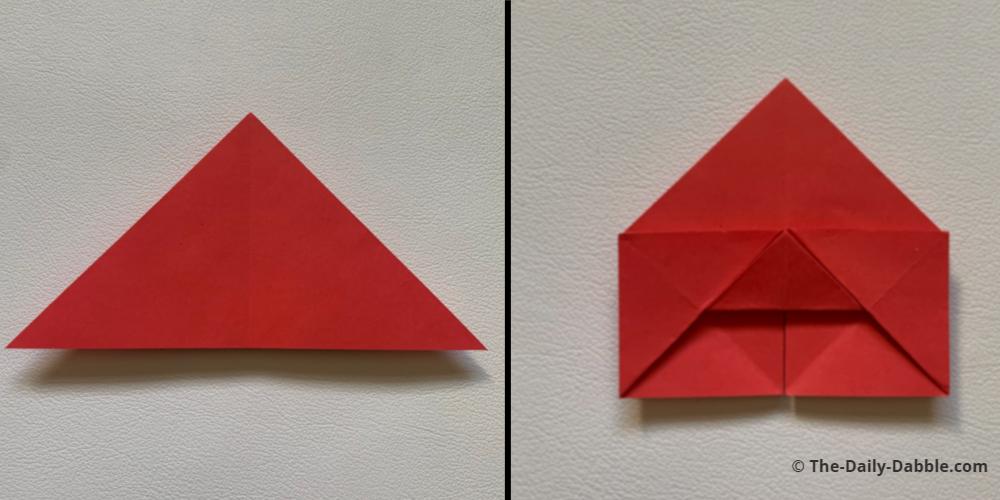
13. Finish shaping the rose

The Daily Dabble is reader-supported. When you buy through links on our site, we may earn an affiliate commission.
manningbutervirty.blogspot.com
Source: https://the-daily-dabble.com/easy-origami-rose/
Post a Comment for "Keep Calm and Love Bee Bumblebee Origami Flower Easy Rose With Peancil"